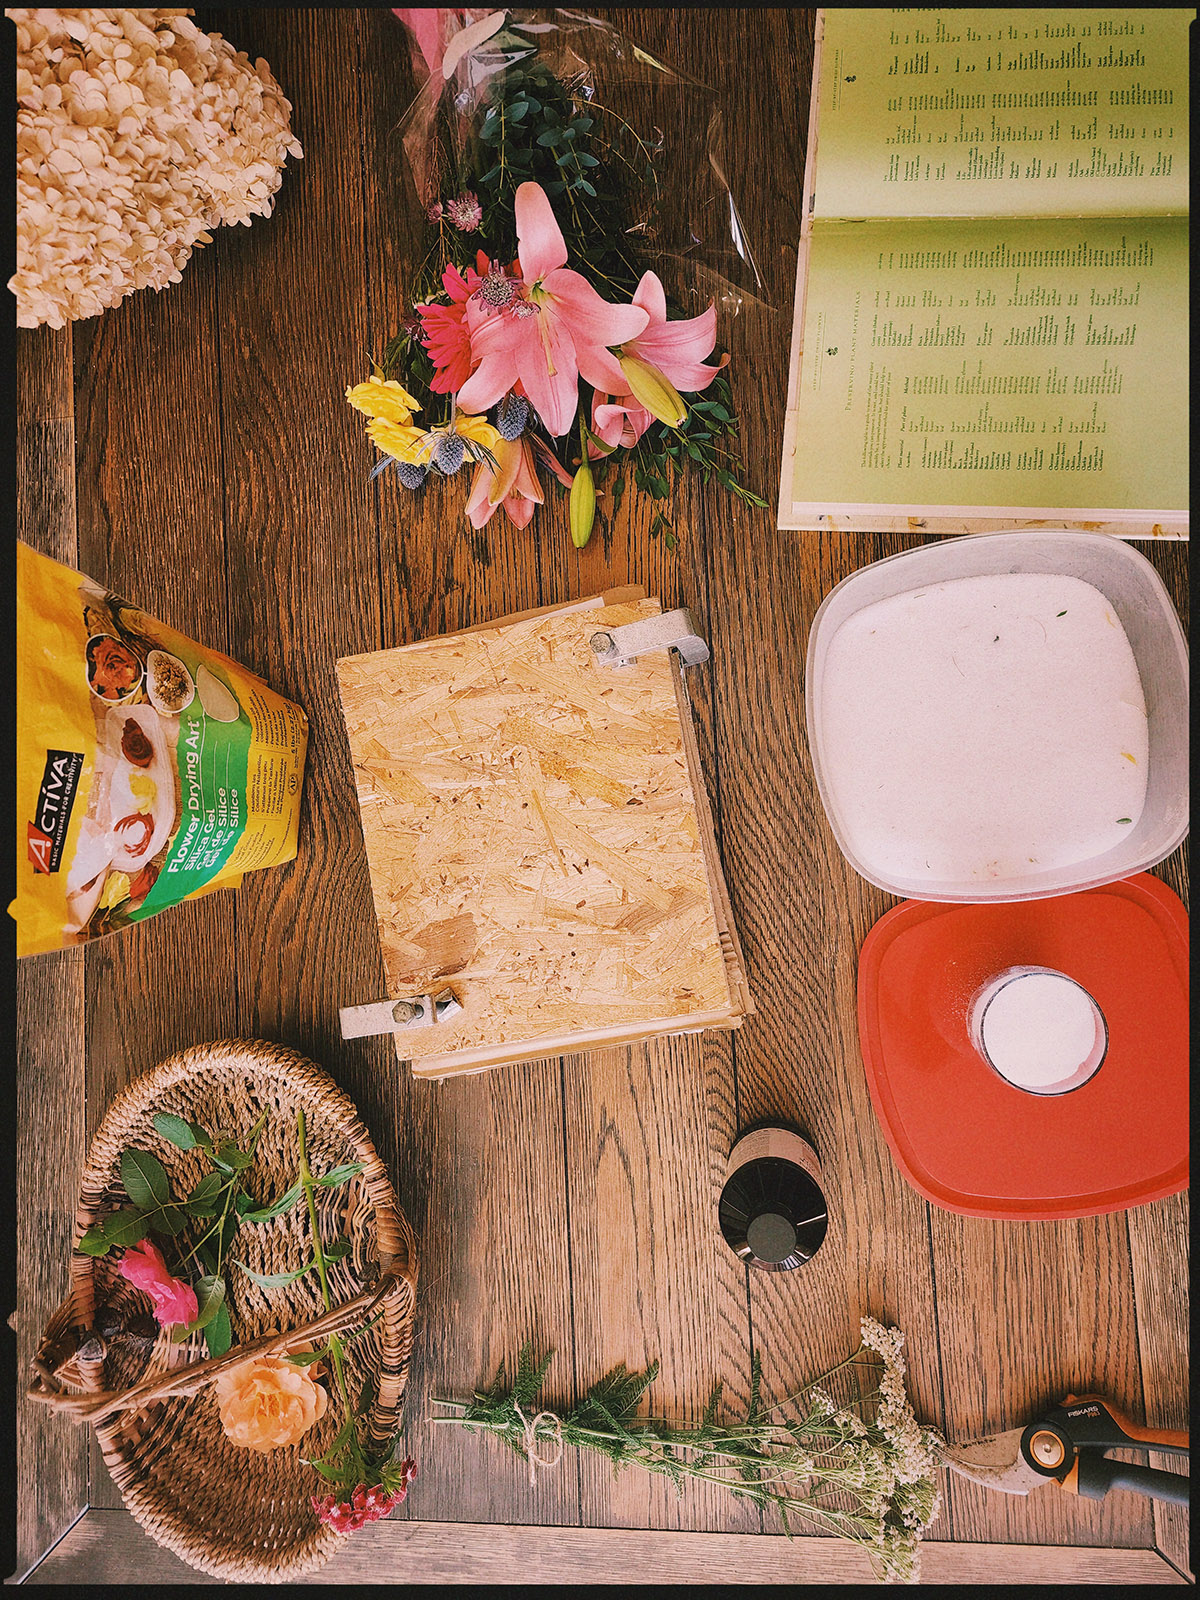

Part of the magic of flowers is how many forms their beauty can take.
A flower can be gathered into a fresh bouquet, flattened between sheets of paper, dried with its shape intact, softened with glycerin, coated in wax, sealed beneath glass, or preserved inside a piece of jewelry. Even after its brief season in the garden has passed, it can continue to hold color, texture, memory, and meaning.
Preserving flowers is not a single technique. Different methods protect different qualities.
Pressing reveals the fine lines of a leaf and the shape of individual petals. Air drying keeps more of a flower’s natural dimension. Silica gel can support layered blooms while their moisture is removed. Glycerin helps certain leaves and branches remain flexible. Wax creates a temporary protective coating, while resin can hold fully dried flowers inside a more permanent decorative object.
The best method depends on the plant itself and what you hope to do with it.

A thin viola behaves differently from a dense rose. Lavender needs different handling than a hydrangea. A branch intended for a garland needs to remain more flexible than a flower destined for a frame. Thick petals, delicate stems, moisture-filled leaves, papery seed heads, and sentimental bouquets all require slightly different decisions.
In Easy and Adorable Pressed-Flower Crafts and Decor Ideas for the Home, we explored ways to use flowers preserved in a flat form. In Beautiful Things to Make with Fresh and Dried Flowers, we looked at the many ways dried botanicals can become part of the home. This guide turns to the preservation process itself: how the main methods work, what each one is best suited for, and how to choose the method most likely to protect the qualities you value.
Before You Preserve Flowers

The condition of the flower at the beginning can affect the finished result as much as the method you choose.
Whenever possible, begin with flowers that are fresh, clean, and free from surface moisture. Flowers gathered immediately after rain or while still covered in dew may dry more slowly and can be more vulnerable to browning, spotting, or decay.
A dry morning after the dew has lifted is often a good time to gather flowers. During very hot weather, collect them before the strongest afternoon heat causes the stems and petals to wilt.

Choose flowers that have opened enough to show their form but have not yet begun to deteriorate. Blooms that are already dropping petals may become too fragile to handle. However, some flowers and seed heads preserve better after they have matured and begun to dry naturally on the plant.
Hydrangeas are a good example. Fresh, newly opened hydrangeas often contain too much moisture and may wilt when cut. Blooms that have matured on the shrub and developed a slightly papery texture are generally better candidates for drying.
Before beginning:
- remove damaged or discolored petals
- check carefully for insects
- remove unnecessary foliage
- gently clean away soil or debris
- trim stems according to the intended project
- decide whether the flower needs to remain flat, dimensional, flexible, or intact
It is also wise to test unfamiliar flowers before preserving an entire bouquet. Two flowers that look similar may react very differently to heat, pressure, glycerin, silica gel, or wax.
Decide Which Qualities Matter Most

Preservation always changes a flower.
The color may deepen or soften. Green leaves may turn bronze. Petals may become translucent, curled, or papery. Stems may shrink. Fragrance may fade. Even professionally preserved flowers will continue to age slowly.
Before choosing a method, ask what you most want to retain.
Do you want to preserve:
- the shape of the whole flower?
- the original color?
- the silhouette of the stem and leaves?
- flexibility for a garland or wreath?
- fragrance for potpourri or a sachet?
- a flat form for paper crafts or framing?
- the arrangement of an entire bouquet?
- only a few meaningful petals or blooms?
There is rarely one method that preserves every quality equally well.
Pressing may protect color and fine detail but remove dimension. Air drying may keep the full flower form but soften the color. Glycerin can preserve flexibility but alter the shade of the leaves. Silica gel may maintain a fuller bloom but make the petals fragile.
The best choice is the method that protects the qualities most important to the finished project.

Separate Mixed Bouquets Before Preserving Them

A meaningful bouquet may contain flowers and greenery with very different needs.
Trying to preserve the entire arrangement using one method can lead to uneven results. Dense flowers may remain damp while delicate fillers become brittle. Greenery may crumble even when the flowers dry well.
Instead, photograph the bouquet from several angles and then separate it by material.
You might:
- dry roses or dahlias in silica gel
- press a few individual petals
- air-dry lavender, grasses, or statice
- preserve eucalyptus or magnolia with glycerin
- dry loose petals on a screen
- save seed heads separately
- preserve the ribbon, card, or bouquet charm
- reconstruct the arrangement after everything is dry
The rebuilt bouquet does not have to duplicate the original exactly. It may become a smaller arrangement, a framed composition, a cloche display, or several keepsakes shared among family members.
Using different methods allows each part of the bouquet to retain more of its own character.
1. Air-Dry Flowers in Small Bundles

Air drying is one of the simplest ways to preserve flowers, herbs, grasses, and seed heads.
Remove most of the leaves, divide the stems into small bundles, and secure them with twine, string, or elastic bands. Hang the bundles upside down in a dry, shaded place with good air circulation.
Elastic bands can be especially helpful because stems shrink as they dry. The band contracts with them and is less likely to allow the bundle to fall apart.
Small bundles are better than large bunches. When too many stems are tied together, the center can hold moisture and dry unevenly.
Air drying works particularly well for flowers and plants with sturdy stems, relatively low moisture, or naturally papery textures, including:
- lavender
- statice
- strawflowers

- globe amaranth
- celosia
- yarrow

- baby’s breath
- roses
- hydrangeas harvested at the right stage
- small daisies
- ornamental grasses
- eucalyptus

- seed heads
- lunaria
- globe thistle
- herbs used for decorative purposes
Choose a space away from strong sunlight, which can fade color more quickly. Avoid rooms with persistent humidity, steam, cooking grease, or large temperature changes.
An attic, dry closet, spare room, enclosed porch, or well-ventilated workspace may be suitable, depending on the climate.
The finished flowers may take on a muted, timeworn appearance. Their petals may curl and their colors may deepen or fade, but this natural transformation is part of the beauty of traditional dried arrangements.
A Note About Hanging Culinary Herbs

Herbs can look beautiful hanging in a kitchen, but herbs intended for food should not remain exposed indefinitely.
Dust settles on hanging material, and kitchens may also contain airborne grease and moisture. Although the herbs could theoretically be rinsed, moisture can make already-dried herbs more difficult to store safely and may reduce their quality.
Dry culinary herbs in a clean, protected place. Once they are fully crisp and dry, remove the leaves from the stems and transfer them to clean, airtight containers. Hanging bundles can still be used as short-term decor or as part of the initial drying process, but they should not remain exposed for months and then be treated as pantry herbs.
2. Dry Sturdy Materials Upright in an Empty Vase

Not every plant needs to be hung upside down.
Grasses, seed heads, woody branches, mature hydrangeas, and other firm materials can often be arranged loosely in an empty vase and allowed to dry upright.

This method helps preserve a more natural standing shape. It is useful for plants that already hold themselves firmly and are unlikely to droop as their moisture leaves.
Good candidates may include:
- ornamental grasses
- wheat
- teasel
- lunaria
- globe thistle
- seed pods
- mature hydrangeas
- woody branches
- statice
- sturdy eucalyptus
- dried-looking wildflowers
Avoid crowding the vase. Air should be able to move between the stems, including near the base.
Fresh, moisture-filled flowers are usually poor candidates for this method. Most will droop before they dry, and stems left standing in water may soften, discolor, or decay.
A small amount of water is sometimes used with specific flowers, particularly mature hydrangeas. The flowers gradually absorb the available water and then begin to dry as the vase empties. This can work when the hydrangeas are already at the proper stage of maturity, but it should not be treated as a general method for all flowers.

For most upright drying, use an empty vase and botanicals that are already structurally capable of holding their form.
3. Dry Petals and Small Flowers on a Screen

Loose petals, tiny flower heads, herbs, and short stems can be dried on mesh screens or ventilated trays.
Spread the material in a single layer, leaving enough room for air to circulate. Place the screen in a dry, shaded location. A second piece of mesh can be placed loosely over the top to protect the flowers from insects, pets, or moving air.
This method works well for:
- rose petals
- calendula petals
- chamomile
- lavender buds
- cornflower petals
- tiny violas
- small flower heads
- herb leaves
- petals for potpourri
- botanical confetti
- wax sachets
- paper-making projects
- dried bath or craft blends
Mesh allows air to reach both sides of the material, helping it dry more evenly than it might on a solid tray.
Turn thick petals or flower heads occasionally if the lower surface remains damp. The material should feel completely dry before it is stored or added to wax, oil, salt, or other projects.
Flowers intended for culinary, cosmetic, or body-care use require correct plant identification and more careful hygiene than flowers intended only for decoration.
4. Press Flowers and Leaves

Pressing removes moisture while flattening flowers and leaves between absorbent surfaces.
This method preserves the outline and fine details of the plant particularly well. It is ideal for flowers that are naturally thin or that can be divided into flatter sections.
Flowers and foliage that often press well include:
- pansies
- violas
- cosmos
- daisies
- delphiniums
- forget-me-nots
- small wildflowers
- ferns
- clover
- Queen Anne’s lace
- flowering herbs
- thin leaves
- individual rose petals
- hydrangea florets
Thick flower heads can sometimes be dismantled before pressing. Individual petals, leaves, and the center of the flower can then be arranged into a new composition after they are dry.
Flowers can be pressed inside a heavy book using absorbent paper, or inside a dedicated flower press. A wooden press applies more even and adjustable pressure and allows several layers of flowers to be preserved at once.

Arrange the flowers carefully before applying pressure. Once the petals begin to dry, they become difficult to reposition without damage.
Because the full process and many finished projects were covered in the Pressed-Flower Crafts and Decor Post, this guide will not repeat every pressing technique. Pressing remains the best choice for botanical journals, cards, framed specimens, bookmarks, collages, trays, wax seals, ornaments, and other projects requiring a flat form.
5. Dry Flowers With Silica Gel

Silica gel is useful when you want a flower to retain more of its original three-dimensional shape.
The material is usually sold as small moisture-absorbing crystals or granules. It supports the flower while drawing moisture from its petals.
Place a layer of silica gel in the bottom of an airtight container. Position the flower carefully, then slowly pour more crystals around it. Work the silica between the petals without crushing or forcing them out of position.
Continue until the flower is fully supported and covered.
This method is particularly useful for:
- roses
- dahlias
- zinnias
- peonies
- ranunculus
- chrysanthemums
- camellias
- carnations
- sturdy daisies
- flowers intended for resin
- blooms for shadow boxes
- sentimental flower heads
Some flowers are best dried facing upward. Others may retain their shape better when placed face down or on their side. The shape of the bloom should guide its position.
Check the product directions for approximate drying times. Removing flowers too early can leave moisture inside them, while leaving them buried too long may make the petals excessively crisp or brittle.
Once dry, uncover the flower gradually and use a soft brush to remove crystals from between the petals.
Many types of silica gel can be dried and reused according to the manufacturer’s instructions.
Can Flowers Be Dried in Sand, Borax, or Cornmeal?
Fine, clean, completely dry sand has traditionally been used to support flowers as they dry.
Sand helps hold petals in place, but it is heavy and may flatten or bruise delicate flowers if it is added too quickly. It also removes moisture more slowly than silica gel, so drying may take considerably longer.
Borax can be mixed with sand to create a more effective drying medium. Another commonly recommended mixture combines borax with white cornmeal. Cornmeal is lighter than sand, making the container easier to handle and reducing the chance that delicate petals will be crushed.
Recipes vary. Equal parts borax and white cornmeal are commonly used, although mixtures containing a smaller proportion of borax may also work. Add the mixture slowly around and between the petals, supporting their natural position as the container fills.
Unlike silica gel, borax mixtures are generally left uncovered in a warm, dry place with good air circulation. Depending on the flower and mixture, drying may take approximately one to three weeks.
Cornstarch also appears in some traditional flower-preservation references, but cornmeal is more consistently recommended in established instructions. Cornstarch may therefore be better treated as an experimental material rather than the first choice for a sentimental or irreplaceable bloom.
These inexpensive mixtures can be useful for experimentation, but silica gel remains faster and more predictable for layered flowers, delicate petals, and blooms whose shape or sentimental importance you especially want to preserve.
6. Use a Microwave for Faster Drying

Microwave drying can preserve flowers much more quickly than traditional air drying, but the timing requires care.
Flowers may be buried in silica gel inside a microwave-safe container, then heated in very short intervals. Microwave flower presses are also available for quickly flattening flowers between absorbent pads.
The method may be useful when:
- flowers are needed quickly for a project
- you are preserving only a few blooms
- maintaining stronger color is important
- you are willing to test the timing first
Every flower responds differently. Size, petal thickness, moisture content, microwave strength, and the amount of silica gel all affect the result.
Begin with very brief intervals. Check frequently and avoid overheating. Flowers can scorch, become brittle, or lose their color when exposed to too much heat.
After microwave drying, allow the flower and drying material to cool completely before handling. A flower may appear dry while still holding heat and moisture near its center.
Never make your first attempt with an irreplaceable wedding, memorial, or anniversary flower. Test the process using similar flowers first.
7. Preserve Leaves and Branches With Glycerin

Glycerin preservation is useful when flexibility matters.
Traditional drying removes moisture and leaves most plant material crisp or brittle. During glycerin preservation, the stem absorbs a glycerin-and-water solution. The glycerin replaces some of the plant’s moisture and helps the leaves remain softer.
This can make preserved greenery easier to bend and arrange in:
- wreaths
- garlands
- swags
- table decorations
- flexible wall hangings
- long-lasting leafy arrangements
Possible materials include certain varieties of:
- eucalyptus
- magnolia
- beech
- oak
- salal
- ruscus
- ivy
- evergreen foliage
- other sturdy leafy branches
Results vary by species. Some greenery becomes darker, bronze, or brown. This may be beautiful, but the finished color may differ considerably from the original.
A common method is to mix glycerin with warm water and stand the freshly cut stems in the solution. Splitting or lightly crushing the ends of woody stems may help them absorb the mixture.
The process may take days or weeks. The leaves gradually change in color and texture as the solution moves through the branch.
Test a small sample before treating all of the material for an important project.
Using Glycerin for Garlands
Greenery preserved with glycerin can be useful for garlands because it is less likely to crumble when bent around a structure.
Evergreen branches may also be treated with glycerin, although results depend on the exact species. Some absorb the solution more readily than others.
Glycerin-treated greenery is still dry botanical material and should be kept away from flames, hot bulbs, fireplaces, radiators, and other heat sources.
8. Preserve Flowers With Wax

Wax dipping gives flowers a protective coating that can temporarily slow moisture loss and help them retain a fresh-looking appearance.
Melt a suitable wax gently and allow it to cool slightly before dipping the flower. The wax should remain liquid, but it should not be so hot that it cooks or wilts the petals.
Hold the flower by its stem and dip it briefly. Rotate it so the wax reaches the petals evenly. Allow the excess to drip away, then hold or place the flower where it can cool without being crushed.
Wax works best with relatively sturdy plant materials such as:
- roses
- camellias
- magnolia leaves
- firm autumn foliage
- compact flowers with strong petals
Delicate flowers may collapse under the weight or heat of the wax.
Wax preservation should be considered temporary rather than permanent. The flower still contains organic material and may eventually discolor or deteriorate beneath the coating.
Keep waxed flowers away from open flames and heat.
9. Freeze-Dry Flowers Professionally

Professional freeze-drying is often chosen for wedding bouquets, memorial flowers, and other irreplaceable arrangements.
During freeze-drying, moisture is removed under carefully controlled, low-temperature conditions. This can help flowers retain more of their original dimension than ordinary air drying.
Professional preservation may be worth considering when:
- the bouquet has strong sentimental value
- maintaining its original shape is important
- it contains difficult-to-dry flowers
- you want the arrangement reconstructed professionally
- you do not want to risk experimenting at home
Many preservation services also place the finished bouquet in a shadow box, display case, or custom frame.
Freeze-dried flowers still need protection. They may be vulnerable to humidity, dust, direct sunlight, and physical handling. Preservation extends their life, but it does not make them indestructible.
10. Seal Fully Dried Flowers in Resin

Resin can preserve dried flowers inside jewelry, decor, and functional objects.
However, resin should not be treated as a way to dry fresh flowers. Flowers should usually be fully preserved first through pressing, silica gel, or another drying method.
Fresh moisture trapped inside resin can contribute to:
- cloudiness
- bubbles
- browning
- decay
- poor curing
- separation around the flower
Once completely dry, flowers can be used in resin projects such as:
- pendants
- earrings
- rings
- bracelets
- bookmarks
- coasters
- trays
- ornaments
- suncatchers
- drawer knobs
- paperweights
- decorative panels
- small keepsake sculptures
Resin offers nearly as many possibilities as there are molds, though projects with thick pours may require a product specifically designed for that depth.
Follow all manufacturer directions regarding ventilation, gloves, measurement, mixing, curing time, and temperature. Test the flower first when the original color is important, since some petals become translucent or shift in tone when coated.
11. Preserve Dried Flowers in Wax Crafts

Fully dried petals and small flowers can also be incorporated into wax projects.
Possible uses include:
- botanical wax sachets
- hanging wax ornaments
- drawer fresheners
- wax seals
- decorative candle exteriors
- seasonal wax tablets
When making candles, dried flowers should be kept safely away from the wick and active flame. Botanicals placed too close to the burning area can catch fire.
A safer option is to use flowers in non-burning wax decorations or to attach them only to the outer surface of a candle that will remain ornamental.
The flowers must be fully dry before they are sealed in wax. Remaining moisture can affect the wax and lead to deterioration within the project.
12. Place Fully Dried Flowers in Decorative Oil Bottles

Small, fully dried flowers and herbs can be suspended in clear mineral oil to make decorative botanical bottles.
Choose bottles with openings wide enough for the materials you plan to use. Arrange the dried flowers with tweezers, a skewer, or another narrow tool, then pour in the oil slowly to reduce bubbles.
Possible materials include:
- tiny rosebuds
- lavender
- chamomile
- helichrysum
- small grasses
- petals
- seed heads
- dried herbs
- delicate fern tips

Fresh flowers should not be used. Their moisture may cause cloudiness, discoloration, or decay.

These bottles are for decoration only. You may wish to clearly label them so they are not mistaken for culinary or medicinal infused oils.
13. Protect Dried Flowers Beneath Glass

A glass cloche, shadow box, floating frame, or display case does not dry flowers by itself. It protects flowers after they have been preserved.
Glass can reduce direct handling and help keep dust away from fragile petals. It also gives a dried arrangement a sense of importance and makes it easier to display as part of the home.
You might combine preserved flowers with:
- moss
- seed heads
- grasses
- stones
- ribbon
- photographs
- invitations
- written notes
- jewelry
- small heirlooms
- pieces of a meaningful bouquet
Make sure every botanical element is completely dry before sealing the display. Remaining moisture can become trapped and lead to mold.
Display preserved flowers away from strong direct sunlight. Even beneath glass, botanical materials will gradually fade when exposed to intense light.
14. Preserve Only a Small Part of an Important Bouquet

A bouquet does not have to remain whole for its meaning to survive.
Sometimes one bloom, a few petals, or a small piece of greenery is easier to preserve and display than the entire arrangement.
You might save:
- one central flower
- a few flowers from each variety
- individual petals
- one leafy branch
- the ribbon
- a bouquet charm
- the original card
- seeds from suitable flowers
- one bloom for a locket or pendant
- a small arrangement for a shadow box
Photograph the complete bouquet before taking it apart. The photograph can be displayed with the preserved elements or placed in a journal alongside pressed petals.
A small keepsake is often easier to protect, move, and incorporate into the home than a full-sized preserved bouquet.
Quick Guide: Which Preservation Method Should You Use?
Choose pressing for:
- thin flowers
- flat botanical art
- journals
- cards
- bookmarks
- trays
- collages
- framed specimens
- individual petals and leaves
Choose air drying for:
- dried bouquets
- wreaths
- garlands
- hanging bundles
- ornamental grasses
- lavender
- naturally sturdy flowers
- seed heads
Choose upright drying for:
- grasses
- mature hydrangeas
- branches
- seed heads
- materials that already hold their shape
Choose screen drying for:
- loose petals
- small flowers
- herbs
- potpourri
- botanical confetti
- wax and paper projects
Choose silica gel for:
- roses
- peonies
- dahlias
- layered flowers
- three-dimensional keepsakes
- resin projects
- shadow boxes
Choose glycerin for:
- foliage
- flexible branches
- garlands
- wreaths
- magnolia leaves
- eucalyptus
- selected evergreens
Choose wax dipping for:
- short-term preservation
- sturdy flowers
- firm leaves
- decorative seasonal projects
Choose professional freeze-drying for:
- wedding bouquets
- memorial flowers
- irreplaceable arrangements
- flowers whose original form matters greatly
How to Store Preserved Flowers

After preservation, keep flowers somewhere dry and protected from strong sunlight.
Humidity can soften petals, encourage mold, or cause glycerin-treated materials to feel damp. Direct sunlight accelerates fading. Repeated handling can break delicate stems and flowers.
Depending on the material, preserved flowers may be stored in:
- archival boxes
- shallow lidded containers
- acid-free paper
- glass display cases
- shadow boxes
- sealed jars
- drawers lined with tissue
- covered storage bins

Do not store flowers until they are fully dry.
When packing three-dimensional flowers, allow enough space that the lid does not press against the petals. Soft tissue can be used to support empty spaces, but avoid materials that snag or crush delicate edges.
Pressed flowers can be stored between clean sheets of paper inside a book, portfolio, envelope, or archival box.

Labeling the flowers with the date, location, plant name, and reason they were gathered can add meaning later, especially when the material is part of a personal herbarium or family keepsake.
Expect Preserved Flowers to Continue Aging

No method can keep a flower exactly as it appeared in the garden forever.
Preserved botanicals continue to respond slowly to light, air, humidity, temperature, and time. Their colors may soften. Green foliage may become bronze. Pale flowers may turn cream. Petals may become more fragile.
This does not mean the preservation failed.
A dried flower carries both its original bloom and the visible passage of time. Its changed color and texture can become part of what makes it beautiful.
The aim of flower preservation is not to freeze the plant in a perfect moment. It is to help some part of that moment remain present.
Let the Plant Guide the Method

Successful flower preservation begins with observation.
Notice whether the petals are thin or fleshy. Feel whether the stem is firm or hollow. Look at how much moisture the flower holds. Consider whether the plant already has a papery texture or whether its beauty depends on softness and fullness.
A viola may be suited to pressing. Lavender can be bundled and hung. A rose may keep more of its shape in silica gel. Eucalyptus may remain more useful after glycerin treatment. Grasses and seed heads may need little more than dry air and time.
There is no single best method for every flower.
Choose according to the nature of the plant, the qualities you most want to preserve, and the way you hope to use it afterward.
A flower will always change as it is preserved. Yet through that change, it can continue as part of a home, a piece of art, a seasonal tradition, or a memory someone decided was worth keeping.
