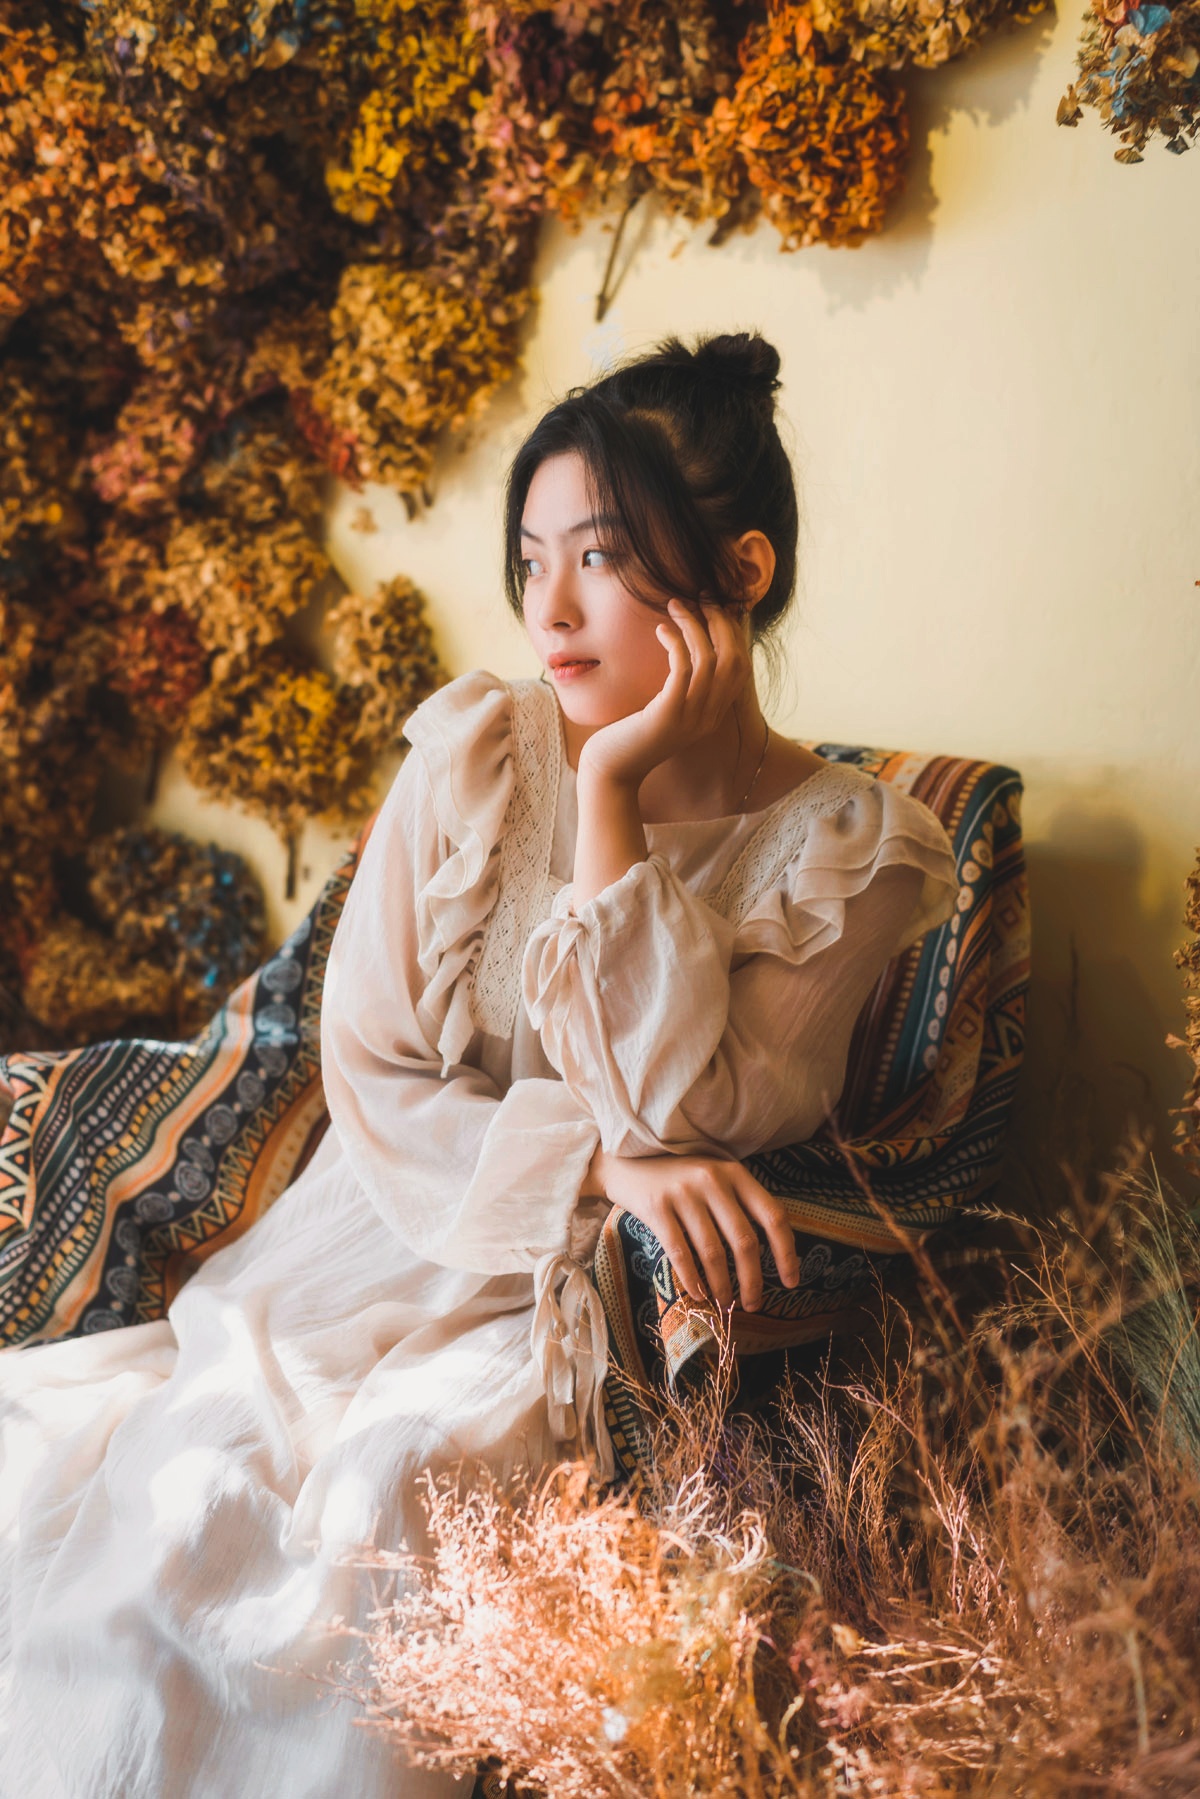

Part of the magic of flowers is just how many ways they can bring beauty and joy into our lives.
They can fill a room with color and scent, become part of a gathering, carry memories, mark the seasons, and offer us materials for making something with our own hands. Petals can leave pigment behind on cloth and paper. Flowers can be pressed into clay, dried into wreaths, suspended in bottles, added to handmade paper, infused into fragrance, or gathered into objects that remain long after the garden has changed.
In Pressed-Flower Crafts and Decor Ideas for the Home, we explored ways to use flowers that had been flattened and preserved. Pressing is only one way to extend their presence in our lives.
Fresh flowers offer flexibility, color, fragrance, and three-dimensional form. Dried flowers bring texture, structure, and a quieter kind of beauty. Leaves, grasses, herbs, petals, and seed heads can each become part of a project according to what they naturally do best.
Some of these ideas preserve the flower itself. Others use its scent, pigment, outline, texture, or shape as the beginning of something new.
Many could also become activities for a garden gathering. In How to Host a Garden Gathering With Edible Flowers, flowers became part of the food, drinks, decor, and shared experience. Here, they become materials for making useful, beautiful, and personal things for the home.
Choose a project that suits the flowers you have, the time available, and how permanent you want the finished piece to be. A fresh flower crown may last for one afternoon. A dried wreath, botanical perfume, or clay relief may carry the season forward in a different form.
The final appearance of a dried-flower display begins with the way its materials were preserved. Some flowers dry beautifully in bundles, while others are better pressed flat, supported in silica gel, conditioned with glycerin, or preserved by another method. For help choosing an approach, see my complete guide to flower-preservation methods before beginning your display.
At the end of the post, you will also find a bonus inspiration gallery filled with wreaths, hanging arrangements, botanical displays, and other beautiful ways to bring dried flowers into the home.
Before You Begin

Gather flowers on a dry day after any dew has evaporated. Look for blooms, leaves, and stems that are clean and free from visible damage or insects.
The best preparation depends on the project:
- use fresh flowers when you want their pigment, flexibility, scent, or three-dimensional shape
- use dried flowers when the finished project needs to last without moisture
- use pressed flowers when the material needs to lie flat
- use fully dried botanicals when working with wax, oil, closed containers, or other materials where trapped moisture may cause clouding, mold, or deterioration
The way a flower is prepared should match both the qualities of the plant and the finished project. Flat, delicate flowers may be suited to pressing. Sturdy blooms and seed heads may air-dry well. Some flowers retain their three-dimensional shape more successfully when dried in sand or desiccant, while evergreens and leafy branches may benefit from glycerin to help them remain flexible. Choose the method according to what you most want to preserve: shape, color, texture, scent, or movement.
Flowers used for crafts do not necessarily need to be edible. However, any project intended for food, drinks, skin, or bathing requires correctly identified, appropriately grown, and suitable plant material.
Keep unknown or potentially toxic plants away from food projects, children, and pets. Wear gloves when working with plants that may irritate the skin, and research a flower before using it in a body-care product.
Creative Projects With Fresh and Dried Flowers
1. Make Handmade Flower-Petal Paper

Flower-petal paper turns recycled paper and garden remnants into something entirely new.
Begin with torn pieces of plain, uncoated paper soaked in water and blended into pulp. Petals can be mixed into the pulp for a scattered, integrated appearance, or arranged on the wet surface so their individual shapes remain more visible.
For a more botanical effect, place small whole flowers, leaves, grasses, or fern pieces onto the sheet while it is still damp. A single stem can create a simple specimen-like design, while scattered petals can form a border, wreath, or loose meadow.
Depending on the flowers and method used, the botanicals may retain some color or soften into faded, earthy shades as the paper dries.
Use the finished paper for:
- handmade cards
- gift tags
- letters
- framed art
- seed packets
- journal covers
- bookmarks
- place cards
- paper ornaments
- small labels
Thin, flat botanicals generally bond more easily with the paper. Thick flower heads hold more moisture and may brown, lift, or dry unevenly. Begin with a small test sheet before using a large quantity of meaningful flowers.
For a garden gathering, prepare the paper pulp ahead of time and allow guests to add their own petals, leaves, or tiny seeds to the surface.
2. Transfer Flower Color Through Petal Pounding

Fresh petals and leaves contain natural pigment that can be transferred onto paper or fabric.
Arrange the botanicals face down on the surface, cover them with a protective layer of paper or cloth, and tap them carefully with a small hammer or mallet. As the plant tissue breaks down, the color and shape begin to transfer.
The results can be unpredictable. Some flowers create vivid impressions, while others produce softer stains or change color as they dry.
Use flower-pounded material to make:
- framed botanical prints
- cloth napkins
- fabric patches
- bookmarks
- handmade cards
- journal pages
- wall hangings
- decorative bunting
- small drawstring bags
Protect the work surface and test both the plant and material first. Natural pigments may continue to fade or change over time, which can become part of the project’s living, imperfect character.
3. Press Fresh Flowers Into Clay

Fresh flowers, leaves, grasses, and seed heads can leave remarkably detailed impressions in clay.
Roll out air-dry clay, polymer clay, or another suitable material, then place a botanical specimen on the surface and press it in gently. Use a rolling pin or your fingertips to transfer the veins, edges, stems, and petal shapes before carefully lifting the plant away.
The impression can remain simple, or it can be enhanced with paint, glaze, wax, or a contrasting wash after the clay has dried.

Use botanical impressions to create:
- small dishes
- wall medallions
- ornaments
- gift tags
- plant markers
- hanging decorations
- coasters
- tiles
- incense holders
- candle plates
- cabinet knobs
- decorative plaques

Delicate stems and leaves often create clearer impressions than very soft, full blooms. Flowers with distinct shapes or textured centers can also work beautifully.
4. Make Botanical Clay Dishes

A small clay dish is one of the most useful versions of the botanical-impression project.
Roll the clay into a flat circle, press a flower or leaf into the surface, and gently shape the edges upward. A small bowl can be used underneath as a mold while the clay begins to dry, provided the clay can be removed without sticking.
Once finished, use the dish to hold:
- rings
- earrings
- keys
- loose buttons
- matches
- small stones
- dried herbs
- tiny keepsakes
Air-dry clay is generally best for decorative use unless the finished piece is sealed with an appropriate product. It should not be assumed to be food-safe or waterproof.
A collection of small dishes made from different garden plants could become a seasonal record of what was growing at the time.
5. Create Plaster Botanical Reliefs

Flowers can be used to create raised botanical artwork through a simple molding process.
Press fresh flowers and leaves into a smooth layer of clay, then remove them carefully, leaving their negative impressions behind. Pour plaster into the mold and allow it to harden. Once released, the final piece will show the plant in raised relief.
This method can preserve tiny botanical details with surprising clarity.
Display the finished relief:
- in a frame
- on a small easel
- as part of a gallery wall
- on a shelf beside botanical books
- in a collection of seasonal specimens
- as a decorative tile
Leave the plaster its natural white for a quiet, sculptural look, or add a soft wash of color to emphasize the lines and textures.
Because plaster and mold-making materials vary, follow the specific product instructions and protect the work area from dust and spills.
6. Make a Dried-Flower Wreath

A dried-flower wreath can preserve the colors and textures of the garden well beyond its growing season.
Begin with a grapevine, wire, straw, or woven branch base. Add small bundles of dried flowers, seed heads, grasses, herbs, and foliage, securing each section with fine wire or twine.
Possible materials include:
- strawflowers
- statice
- lavender
- yarrow
- hydrangeas
- globe amaranth
- dried roses
- grasses
- wheat
- herbs
- seed pods
- small branches
- dried ferns
A full wreath can feel abundant and romantic, while an asymmetrical arrangement covering only part of the base feels lighter and more natural.
Keep dried wreaths away from open flames, moisture, and direct sun. Over time, the colors may soften, but the changing tones can add to their aged character.
7. Make Mini Wreaths and Botanical Rings

Small wreaths require fewer flowers and can be used throughout the home.
Create them with embroidery hoops, thin wire, grapevine rings, or flexible twigs. Add dried flowers and herbs in small clusters or cover the entire ring.
Use mini wreaths:
- on cabinet doors
- around candles or jars
- as napkin rings
- on chair backs
- as ornaments
- tied to gifts
- above a small mirror
- on a gallery wall
- around place cards
- hanging from drawer pulls
A miniature wreath can also frame a photograph, handwritten word, or meaningful date.
These are especially practical when you have only a small quantity of each flower or several broken stems left from a larger project.
8. Create a Flower or Evergreen Garland

A garland allows individual flowers, leaves, evergreens, or small bundles to become part of a longer decorative arrangement.
Tie dried stems at intervals along twine, thread sturdy flower heads with a needle, or attach small botanical bundles with fine wire.
Evergreen branches are especially well suited to garlands because they provide fullness, fragrance, and strong structure. Fresh evergreen garlands can be made for short-term seasonal use, while glycerin-preserved foliage may remain flexible and attractive for much longer.
Use garlands made from:
- dried flowers
- herbs
- grasses
- seed heads
- preserved leaves
- cedar
- pine
- fir
- juniper
- mixed evergreens
Hang the garland:
- across a mantel
- above a window
- along a headboard
- beneath a shelf
- around a mirror
- across a garden structure
- above a seasonal table
- vertically on a narrow wall
A garland made from one material feels cohesive, while a mixture of flowers, herbs, seed heads, and evergreen foliage creates a more layered, gathered appearance.
The preservation method should suit the plant. Delicate flowers may be best dried, while evergreen foliage and certain leafy branches often benefit from glycerin because it helps them retain flexibility rather than becoming brittle.
Avoid hanging dried or preserved plant material near candles, fireplaces, stoves, heaters, or other sources of flame and heat.
9. Create Hanging Flower and Herb Bundles

One of the simplest ways to dry flowers and herbs is to gather them into small bundles and hang them upside down in a dry, well-ventilated place.
Tie the stems with twine, ribbon, or an elastic band, then hang them from hooks, pegs, rails, or a suspended branch. Small bundles usually dry more evenly than large, tightly packed bunches.
Bundles may be organized by:
- flower type
- color
- scent
- season
- garden location
- intended use
- symbolic meaning
Lavender, grasses, strawflowers, yarrow, statice, and many culinary herbs tend to dry well this way.
Hanging bundles can be attractive while they dry, but herbs intended for eating should not remain exposed indefinitely. Dust, cooking oils, steam, and other airborne residue can collect on plants left hanging in a kitchen. Once culinary herbs are fully dry, remove the leaves or store the bundles in clean, airtight containers kept away from heat, light, and moisture.
Flowers and herbs intended only for decoration may remain hanging longer, although they will still collect dust over time. Display them away from the stove and other areas where grease or humidity is likely to build up.
A short row of drying bundles can bring the feeling of a working garden or old apothecary into a kitchen, pantry, workroom, or garden shed while the plants are actively being preserved.
10. Make Dried-Flower Wax Sachets

Wax sachets are decorative pieces made from wax, fragrance, and dried botanicals. They can be hung in closets or placed in drawers to add a gentle scent.
Melt wax according to the product instructions, pour it into a mold, and allow it to begin setting before placing fully dried flowers, herbs, or petals on the surface. Add a hole or loop for ribbon if the sachet will be hung.
Possible additions include:
- dried rose petals
- lavender
- chamomile
- rosemary
- mint
- citrus peel
- spices
- essential or fragrance oils suitable for wax
Botanicals should be fully dry before they are placed into wax. Keep finished sachets away from heat, flame, children, pets, and surfaces that may be damaged by wax or oil.
These are decorative fragrance pieces and should not be burned like candles.
11. Decorate Candles With Dried Petals

Dried petals can be incorporated into the outer surface of decorative candles.
One method is to place the petals against the candle and cover them with a very thin layer of melted wax. Another is to add them to the outside of a container or create a botanical sleeve that sits around a flameless candle.
Flowers can add color and texture, but dried plant material is flammable. Keep petals, leaves, and stems far from the wick and eventual melt pool. A heavily decorated candle should be treated as ornamental unless the design and materials have been properly tested for safe burning.
The safest option is to decorate a flameless candle or the exterior of a glass candleholder rather than placing dried material near an open flame.
Use the project to preserve:
- petals from a meaningful bouquet
- flowers from a wedding
- herbs from the garden
- seasonal colors
- tiny blossoms collected during a walk
12. Make Botanical Candleholders

A glass jar or candleholder can be decorated with dried flowers without attaching them directly to the candle.
Apply petals and thin leaves to the outside using a suitable clear decoupage medium, or place them between two glass layers when using a double-walled vessel designed for decoration.
The glow from within can reveal the shapes and veins of the botanicals.
Battery-operated tealights are the simplest and safest source of light, especially when paper, flowers, or adhesive are involved.
Create several holders using different flowers and group them along a table, windowsill, mantel, or outdoor gathering area.

13. Fill Botanical Bottles

Small glass bottles can hold dried flowers, herbs, seeds, grasses, or seed heads as miniature botanical displays.
Leave the material dry, or fill the bottle with clear mineral or baby oil for a preserved, apothecary-style appearance. Botanicals placed in oil must be thoroughly dried, since remaining moisture may cause clouding or deterioration.
I go into into more details on how to use oil in your bottle in the Flower Preservation Guide.
Use bottles to preserve:
- a flower from a meaningful day
- seeds from the garden
- petals from a bouquet
- a collection of tiny woodland finds
- herbs associated with a season
- flowers chosen for their symbolism

Add labels, ribbon, handwritten tags, sealing wax, or a small note explaining the contents.
A group of bottles in varied shapes can become a cabinet display, shelf arrangement, or collection of personal botanical correspondences.
14. Make Floral Bath Salts or Bath Tea Sachets

Appropriately chosen dried flowers and herbs can be added to bath salts or enclosed in fabric or paper tea sachets intended for bathing.
Possible ingredients may include:
- rose petals
- lavender
- calendula
- chamomile
- cornflower petals
- oatmeal
- mineral salts
Loose petals can be beautiful in the water, but they may also cling to the tub or enter the drain. A reusable muslin bag or disposable bath tea sachet keeps the botanicals contained and makes cleanup easier.
Only use plants known to be suitable for topical use, and avoid ingredients that may irritate sensitive skin. Clearly label the contents when giving bath products as gifts.
A small jar of floral bath salts can become a thoughtful addition to a guest room, care package, or seasonal self-care basket.
15. Make Dried-Flower Sachets for Drawers and Closets

Fabric sachets offer a simple way to use fragrant dried flowers and herbs.
Fill small sewn or drawstring bags with materials such as lavender, rose petals, mint, rosemary, cedar, or other appropriately dried aromatic plants.
Place them:
- in dresser drawers
- with stored linens
- inside closets
- in a guest room
- near a bedside table
- in seasonal storage boxes
- among handmade gifts
The scent will gradually soften. Gently squeezing the sachet may release more fragrance, or the filling can be replaced when it no longer carries enough aroma.
Choose a fabric with a weave fine enough to contain the dried plant material while still allowing the scent to escape.
16. Make Natural Petal Confetti

Dried petals can replace plastic confetti for gatherings, weddings, gifts, and seasonal tables.
Dry petals in a single layer until no moisture remains, then mix colors and flower types to suit the occasion.
Use petal confetti:
- along a table
- inside cards
- around place settings
- in gift wrapping
- at weddings
- in photographs
- inside clear ornaments
- in paper cones for guests
Check whether outdoor venues permit natural confetti before using it. Even biodegradable materials should be used thoughtfully, especially in protected landscapes or areas where unfamiliar plant material should not be scattered.
Petals from roses, delphiniums, hydrangeas, calendula, and other colorful flowers can create a softer, more natural effect than manufactured confetti.
17. Make Flower Crowns, Barrettes, Hats, and Floral Hairpieces

Fresh or dried flowers can become crowns, combs, barrettes, clips, pins, and small botanical arrangements for hats.
A full flower crown creates a more whimsical effect, but it is only one possibility. A small floral barrette may be easier to make, wear, and keep. A comb can be tucked into an updo, while a tiny arrangement attached to a straw hat can add a soft seasonal detail without covering the entire brim.

Possible projects include:
- a full flower crown
- a half crown
- a floral headband
- a small barrette
- a decorated hair comb
- a single flower clip
- a botanical brooch
- a small arrangement attached to a hat
- dried flowers tied around a hatband

Fresh blooms feel lively and seasonal but may wilt during the day. Dried flowers are more fragile, yet they can last much longer and become keepsakes afterward.
Possible materials include:
- flexible greenery
- small fresh flowers
- dried blooms
- seed heads
- floral wire
- floral tape
- combs, clips, or barrettes
- ribbon
- a plain hat or removable hatband
Choose lightweight materials and keep wire ends fully covered. Flowers that are too large or heavy may pull the piece out of position.

A removable cluster is often the most practical choice for a hat. Attach the flowers to a pin, clip, comb, or separate ribbon band so the arrangement can be repositioned or removed without permanently altering the hat.
18. Create a Botanical Mobile or Hanging Installation

Flowers, seed pods, grasses, and dried leaves can be suspended from a branch, hoop, or simple wooden frame.
Hang individual specimens at different heights with thread or fine cord. The movement of air will gently shift the materials, allowing their silhouettes and spacing to become part of the design.
Create a mobile from:
- one season’s flowers
- translucent seed pods
- grasses and delicate stems
- flowers from a meaningful bouquet
- botanicals gathered from one place
- monochromatic materials
- a gradual color palette

A small mobile can hang in a window or quiet corner. A larger installation can be suspended above a table or used as temporary gathering decor.
Make sure all overhead pieces are secured safely and placed away from flame, heat, and high-traffic areas.
19. Arrange Dried Flowers Beneath a Glass Cloche

A glass cloche can protect delicate dried flowers while giving them a sense of importance.
Arrange one bloom, a miniature bouquet, a nest-like circle of flowers, or a small seasonal scene on a wood, stone, ceramic, or mirrored base. Add moss, seed heads, ribbon, a handwritten label, or another meaningful object if desired.
A cloche works especially well for:
- wedding flowers
- a child’s first bouquet
- memorial flowers
- rare garden blooms
- an anniversary arrangement
- a collection of tiny woodland materials
- seasonal displays
Keep the arrangement away from strong direct sunlight and excess humidity.
The glass transforms an easily overlooked dried flower into something that feels collected, protected, and intentionally displayed.
20. Make a Simple Floral Pomade or Solid Perfume

Fresh, highly fragrant flowers can be used to scent a neutral fat through a traditional method known as enfleurage.
Historically, perfumers spread purified animal fat onto glass and laid fresh flowers across the surface. The fat gradually absorbed the fragrance, and the spent flowers were replaced with fresh ones repeatedly until the scent became concentrated.
A simplified home version can be made with a firm, nearly scentless fat such as deodorized coconut oil.
Spread a thin layer of the fat inside a clean, shallow glass dish. Gently press fresh, dry, fragrant petals onto the surface, then cover the dish and leave it in a cool place away from direct sun. After a day or two, remove the fading flowers and replace them with fresh ones.
Repeat the process several times until the fat carries as much fragrance as possible.
Flowers that may be worth experimenting with include:
- jasmine
- gardenia
- rose
- lilac
- honeysuckle from a correctly identified species
- tuberose
- violet
- fragrant narcissus
- mock orange
The finished scented fat can be used in a very small amount as a solid perfume, provided the flower and fat are suitable for skin use and do not cause irritation.
Keep in mind that homemade floral fragrance is often much softer than commercial perfume. Some flowers release their scent readily, while others smell beautiful on the plant but transfer very little fragrance into fat.
Use clean, completely dry flowers and utensils, since fresh plant material introduces moisture and can shorten the life of the finished product. Make small batches, store them in the refrigerator, and discard the pomade if its scent, appearance, or texture changes.
A more traditional perfume-making process extracts the captured fragrance from the fat with alcohol, but that is more involved and would be better explored in a dedicated tutorial.
21. Arrange a Fresh or Dried Bouquet

A bouquet is one of the simplest ways to work creatively with flowers, but it can be as loose or carefully composed as you choose.
A small arrangement might contain only a few stems gathered from the garden and placed in a jar, bottle, pitcher, or bud vase. A more layered bouquet can combine flowers with foliage, herbs, grasses, branches, berries, seed heads, and trailing materials.
When arranging a bouquet, consider:
- varying the height of the stems
- combining rounded flowers with finer, airier forms
- using foliage to give the arrangement structure
- repeating one color in several places
- allowing a few stems to arch or extend naturally
- leaving enough open space for individual flowers to be seen
- choosing a container that supports the mood and scale of the arrangement
Fresh bouquets bring movement, fragrance, and seasonal color into a room. Dried bouquets have a quieter, more sculptural quality and can remain on display much longer.
Flowers that often dry well for bouquets include:
- strawflowers
- statice
- globe amaranth
- yarrow
- lavender
- hydrangeas
- celosia
- dried roses
- grasses
- wheat
- seed heads
- eucalyptus
- sturdy herbs and foliage
Most flowers should be removed from water before drying. Leaving a bouquet in water until it evaporates can cause the blooms to droop, the stems to weaken, or the plant material to deteriorate before it dries properly.
A few sturdy flowers, particularly mature hydrangeas, may sometimes dry successfully in a vase with only a small amount of water, but this method does not suit most varieties. In general, flowers are more reliably dried using a method appropriate to their structure, then arranged in a vase once all moisture has been removed.
A preserved bouquet can also carry personal meaning. It may include flowers from your own garden, a gathering, a wedding, a memorial, or a particular season you want to remember.
22. Make Potpourri

Potpourri gives dried flowers, fragrant herbs, citrus peel, seed pods, and spices a second life as a naturally inspired scent display for the home.
Begin with plant materials that are fully dry. Any remaining moisture can lead to mold or spoilage once the ingredients are combined or stored in a jar.
Possible ingredients include:
- rose petals
- lavender
- chamomile
- calendula
- dried hydrangea petals
- mint
- rosemary
- lemon balm
- dried citrus peel
- cinnamon sticks
- cloves
- star anise
- cardamom pods
- small pinecones
- seed heads
- dried berries intended for decorative use
Choose ingredients according to both scent and appearance. Rose petals and hydrangeas add softness and color, while citrus peel, spices, herbs, seed pods, and small cones give the mixture more texture and structure.
The natural scent of dried flowers is often subtle, especially after they have been stored for some time. A small amount of a suitable fragrance or essential oil can be added if you would like the scent to be stronger. Add only a little at first, mix gently, then allow the potpourri to rest in a closed jar for several days so the fragrance can disperse through the ingredients.
A fixative may also be added to help the fragrance linger, although it is optional for a simple homemade mixture. Follow the directions for any fragrance or fixative product you use.
Display the finished potpourri in:
- an open bowl
- a shallow tray
- a glass jar
- a covered apothecary jar
- a decorative dish
- a small fabric sachet
- a basket lined with paper or cloth
Keep the mixture in a lidded container when you are not using it so the scent lasts longer. Gently stir or turn it from time to time, and refresh it with another drop or two of fragrance when needed.
Place open potpourri away from moisture, cooking grease, direct sunlight, and areas where children or pets may disturb or ingest it. The ingredients are intended for scent and decoration unless every component has been specifically prepared for another use.
Potpourri can also preserve the atmosphere of a particular season. A spring mixture might include rose petals, lavender, and dried lemon peel. Autumn could bring cinnamon, cloves, orange, seed pods, and faded flowers. Evergreen tips, spices, and dried citrus can carry the scent and texture of winter into the home.
23. Create Resin Flower Crafts

Resin can preserve dried flowers inside clear, durable objects in almost any shape you can imagine or find a mold for.
Small molds can turn petals and tiny blooms into:
- earrings
- necklace pendants
- rings
- bracelets
- hair clips
- buttons
- keychains
- magnets
- ornaments
- bookmarks
- coasters
- trinket dishes
- drawer knobs
- paperweights
- candleholders
- decorative tiles
Larger molds can be used for trays, wall art, bookends, lamps, table accents, or keepsakes made from a meaningful bouquet.
Flowers must be completely dry before they are placed in resin. Fresh flowers contain moisture that may cause browning, cloudiness, bubbles, or deterioration inside the finished piece. Pressed flowers work well for thinner molds, while flowers dried in silica or another desiccant may retain enough shape for deeper casts.
Arrange the botanicals inside the mold before pouring, or add them between thin layers of resin so they remain in the position you intended. Clear resin allows the flower to remain the focus, while pigments, metallic flakes, decorative paper, or softly tinted backgrounds can add another layer of color and meaning.
Resin can be unforgiving, especially when air bubbles, floating flowers, or uneven curing occur. Begin with a small project, follow the manufacturer’s measurements and curing instructions carefully, and work with suitable gloves, ventilation, and surface protection.
A single petal can become a delicate piece of jewelry, while an entire bouquet can be divided among several objects and shared as keepsakes. The possibilities are limited mainly by the size of the flowers, the depth of the mold, and what you would enjoy making.
24. Create a Dimensional Dried-Flower Frame

A deep frame or shadow box allows dried flowers to retain their natural shape rather than being flattened beneath glass.
Arrange whole blooms, stems, leaves, grasses, and seed heads against a firm backing. The flowers can remain completely inside the frame, or a few sturdy elements can extend beyond the edges for a looser, more sculptural effect.
Possible arrangements include:
- a miniature dried bouquet
- flowers radiating from the center
- a small meadow scene
- an asymmetrical cluster in one corner
- flowers surrounding a photograph, quotation, or meaningful date
- preserved pieces from a wedding or special bouquet
- one sculptural bloom displayed like a botanical specimen

Use a shadow box when you want the flowers protected behind glass. An open-backed or glass-free frame allows the arrangement to project outward more dramatically, although it will also be more exposed to dust, moisture, and damage.
Attach the botanicals with methods suited to their weight and the backing material, such as fine wire, floral adhesive, discreet stitching, or small amounts of strong craft glue. Handle dried flowers gently, since delicate petals and stems can break easily.
A dimensional frame combines the feeling of a floral arrangement with the permanence and display possibilities of wall art.
25. Decorate Gifts and Envelopes With Flowers

Fresh or dried flowers can make even simple wrapping feel thoughtful and personal.
Tie a small stem or botanical bundle beneath ribbon or twine, tuck a flower beneath a wax seal, or attach a dried bloom to a gift tag. A single delicate sprig may be enough, especially when the wrapping paper and ribbon are kept simple.
Flowers can be added to:
- envelopes
- wrapped gifts
- handwritten letters
- gift tags
- favor boxes
- seed packets
- place cards
- small keepsake packages
Choose flowers that are lightweight and reasonably sturdy. Baby’s breath, lavender, statice, grasses, tiny daisies, dried herbs, and small seed heads are often easier to attach than large, brittle blooms.
For an envelope that will be mailed, keep the arrangement flat and consider placing it inside an outer envelope to protect it. Dimensional flowers are better suited to hand-delivered letters, gifts, and display pieces.

A wax seal can hold a small stem in place, although the flower may need an additional dot of adhesive if it feels loose. For gifts, secure the botanical material beneath twine or ribbon so it can be removed without damaging the wrapping.
The flower can also be chosen for its meaning, color, season, or connection to the recipient. Even a very small detail can make the wrapping feel like part of the gift.
26. Decorate a Mirror With Dried Flowers

A mirror can become the foundation for a dimensional botanical arrangement.
Attach dried flowers, grasses, preserved foliage, or palm leaves around part of the frame, allowing the arrangement to extend beyond the mirror’s usual outline. An asymmetrical cluster across the top or one side often feels more natural than covering the entire frame.
Possible materials include:
- dried hydrangeas
- pampas grass
- palm leaves
- preserved ferns
- strawflowers
- statice
- amaranth
- seed heads
- grasses
- bleached or naturally pale foliage
Before attaching anything permanently, arrange the materials on the floor or a large table so you can test the overall shape. Begin with the largest structural pieces, then add medium flowers and smaller details to fill the gaps.
Flowers may be secured to a removable wire form, grapevine base, or narrow strip of sturdy material that is later attached to the mirror. This is often easier than gluing every flower directly to the frame and allows the arrangement to be removed or changed.
Keep the mirror’s weight, hanging hardware, and location in mind. A large floral arrangement adds bulk and may require stronger wall support. Avoid placing it where people will brush against the dried materials, since stems and petals can become brittle over time.
The result can feel part wreath, part floral installation, and part architectural accent.
27. Create a Large Dried-Flower Wall Display

Dried flowers can be used on a much larger scale to create a wall installation that feels almost like a suspended garden.
Rather than arranging flowers inside a vase or frame, build the display directly across a section of wall or attach the botanicals to a hidden support such as wire mesh, branches, a wooden panel, or a lightweight framework.
A large display might include:
- clusters of hydrangeas
- grasses and seed heads
- palm leaves
- dried branches
- amaranth
- statice
- preserved foliage
- strawflowers
- bleached botanicals
- flowers grouped by color or season
Begin with the overall shape before filling in the details. The installation might curve around a corner, rise above a chair, frame a doorway, spill across the top of a wall, or form a concentrated botanical cloud.

Use larger, sturdier materials to establish structure and depth. Add softer flowers and smaller stems afterward to create transitions, texture, and color.
Because a wall installation can become heavy, the support system matters as much as the composition. Secure everything to suitable wall anchors or a stable framework, and keep the arrangement away from heat sources, candles, cooking areas, and damp rooms.

Dried flowers naturally collect dust, especially in large open displays. Position the arrangement where it can be cleaned gently with a soft brush, low-setting air blower, or careful vacuum attachment without being disturbed frequently.
A large botanical installation can transform an otherwise plain corner into a dramatic, deeply textured part of the room.
More Flower Projects to Explore
Fill Clear Ornaments With Dried Flowers
Place tiny dried flowers, petals, herbs, or seed heads inside clear ornaments for seasonal decor. Add ribbon, handwritten labels, or small pieces of decorative paper.
Make Decorative Floral Soap
Dried flowers can be used sparingly on the surface of melt-and-pour or handmade soap. Choose skin-safe botanicals and remember that many flowers darken when exposed to heat and moisture.
Create Dried-Flower Embroidery Hoops
Stretch translucent fabric, lace, or fine mesh across an embroidery hoop and stitch, tie, or attach dried flowers to create a dimensional botanical wall hanging.
Make Botanical Place Cards
Write each guest’s name on a small card and add a fresh sprig, dried flower, seed head, or tiny bundle chosen for its color or meaning.
Make Garden-Inspired Fire Starters
Wax, natural fiber, and dried botanical materials can be combined into fire starters for an indoor fireplace or outdoor fire. Because they are designed to burn, this project needs a dedicated safety-focused tutorial and should never be confused with decorative candles.
Let the Material Guide the Project

Flowers change as they dry, fade, release color, or become part of another material.
That unpredictability is one reason botanical crafts feel so personal. A clay impression may preserve details that were difficult to see on the living leaf. A petal may release an entirely unexpected color onto cloth. A dried seed head may become more sculptural after its brightness has faded.
The finished project does not need to recreate the flower exactly as it was.
It may preserve its shape, scent, pigment, texture, or memory. It may become part of an object used every day, or remain temporary, created for one gathering or one season.
Begin with what is available. Gather fallen petals, trim a few herbs, save a meaningful bloom, or look again at the dried bouquet that has been waiting on a shelf.
The garden offers more than something to look at. It gives us materials for making, remembering, experimenting, and bringing the living world more deeply into the home.
More Dried-Flower Inspiration
The ideas above can be adapted in countless ways depending on the flowers, grasses, branches, seed heads, vessels, and spaces available to you. These final examples offer a little more inspiration for wreaths, wall displays, hanging arrangements, and botanical details throughout the home.
Click or tap any image to enlarge it and move through the gallery.


